
She shuffled forward.
“I would…”
“Speak up!”
“I would like you to…”
“Yeeeeeesssss?”

“I would like you to typeset this.”
A messy wad of pages; some in different colours, some upside down, some not in any recognisable language.
“You would like me to TYPESET this would you?”

“Yes”
“You have come to the right place.”

—————
I just typeset a book.
It is called George Calderon: Edwardian Genius.
You might have heard of it.
It will be published on 7 September.
Now I will teach you how to typeset a book.
Let’s go.
—————
First of all, what IS typesetting?
The process of self-publishing a book goes something like this:
1. write manuscript
2. make it into a PDF
3. design cover (also PDF)
4. printers print from the PDFs
5. you receive a truck full of copies of your book*
*Note: you now have approximately one fewer room in your house.
Step 2 is what we call “typesetting”, and it is what I did for George Calderon: Edwardian Genius. At its most basic, digital typesetting involves resizing pages to the same format as the final book and then setting the font and paragraphs to look “right” under these new page dimensions. (Some self-publishers seem even to leave out that second part. Pro-tip: don’t, it’s really important.)
When I began, I had only a Word document from Sam1 of the complete text of the book. I began experimenting, shaping this Word document into what would eventually be sent to the printers Clays, and I made a short text file of “steps” that I was performing. I felt that if at any point I had to start again from scratch that would be valuable to reconstruct my work.
I quickly moved on from the steps described in this text file, but here is what it looked like at the last point it was updated:

As you will no doubt realise, some of these instructions are esoteric to how we wanted things to look in George Calderon: Edwardian Genius, and some are necessary actions that you will need to take when typesetting ANY book.
Shortly after writing this text file I decided that step 4 was far too crucial to the appearance of the book (and certainly a key dictator of the eventual number of pages)…far too crucial to be awkwardly done somewhere in the middle of the process.
So I recommend as the very first step in typesetting from a text document…
STEP 1: SET UP THE PAGE SIZE
I used LibreOffice Writer for most of the typesetting, so this is what I’ll be taking my example screenshots from.
Before I continue, I need to stress that it is absolutely imperative that every choice you make is associated with a “style” profile.
If you’re used to writing small documents like 12-page essays for school then the concept of “styles” will seem pointless and alien. In a short document you can just highlight what you like, select how you want it to look, and the computer pretty much “remembers” how you’ve asked for it. Then you print it anyway and you’re done. Sometimes you open the document again and it doesn’t remember how you formatted something and you mutter “stupid computer, glitching out, bunch o’ bugs” but it’s not really because of bugs in the code that the document didn’t “remember” your formatting…it’s because you didn’t use styles.
The Calderon book is about 550 pages so I simply CANNOT risk any formatting being lost, and also I need clean ways to standardise and recycle stock pieces of formatting. So it was fundamental that I be rigorous in using styles.
“OK Kamaji, I get it. I need styles. But what ARE styles?”
Styles are little profiles that you set up using the column on the right in the following screenshot.

They are information cards where you define all sorts of formatting details; then, when you need a part of your document to have those properties, you just highlight that part and apply that style.
Once you get used to using them it becomes quite peculiar to think that for smaller documents the software can “remember” at all how you wanted something to look. Applying formatting using a “style” becomes so intuitive that the notion of formatting anything without one seems as ludicrous as baking a cake without a tin.
I won’t go into too much detail about exactly what to click in LibreOffice Writer to set up styles but you can find lots of guides online about how to use styles in whatever word processing package you are using. Indeed, they work EXACTLY the same in Microsoft Word.
Styles are typically divided into Paragraph, Character, Frame, Page, and List styles. Since we’re starting by setting up the page, we’re going to use a Page style. Mine for the Calderon book looks like this:

The “paper format” is the size of your book. For printing with Clays, their “Royal” size is 153mm x 234mm, so that’s what goes in the width and height fields. Interestingly, it appears “Royal” is different for different printers and it is very important to get the exact numbers here so check with your printers exactly what the dimensions are!
The margins are how much white space there is around the content. We went quite low with these, because it was looking like the book was going to be very long already and we were keen to do anything subtle that we could to keep the page count down.
Your printer will advise you on minimum/recommended margin size but I also strongly urge looking at printed books and measuring their margins to get an idea for what is industry-typical.
If you have images that go all the way to the edge of the page you need to negate your margins on those pages and even run the images outside of the paper size (to create what is called a “bleed”) but I’m not going to talk about that here since we didn’t use it for this book.
The “inner” margin needs to be larger to compensate for the obscuring nature of the middle crease where the book spreads open, and – perhaps more importantly – the fact that some of that part of the page is “eaten” by the binding. In desktop publishing this extra is called the “gutter”.
From studying the materials from Clays, as well as various online resources, I was sure that adding 7mm for the gutter was correct. However, when the book arrived I felt that this was too large and I could have afforded to go closer to the centre of the page. By contrast, the outer margin felt a little near to the edge, so if I could do it all again I would probably reduce the inner margin to 19mm and extend the outer to 16mm. It is worth pointing out too, though, that the apparent asymmetry of horizontal margins in the finished book is not entirely my fault as, upon measuring, it transpires that Clays produced the book with a lessened outer margin than we specified. [Probably because they have a ‘trim tolerance’ of 3mm, which they did not spell out in advance – Ed.]
The “mirrored” page layout is what allows you to set inner and outer margins rather than left and right, so make sure you use it!
At this point I would say experiment experiment experiment. When you typeset a book there is a lot of trying it this way and then that way until you settle on how you like it (which may even be a compromise with increased page count etc.) and the sooner you get used to fiddling with the values, the sooner you will feel familiarity with the process and the confidence to tweak freely.
STEP 1B: SET UP THE HEADERS
In this book we were keen to have “running heads” (the book and chapter titles at the top of alternate pages). To do this you use the “Header” tab.

Even if you don’t want running heads, you likely need to incorporate a header or footer for page numbers so you’ll still be needing these parts of the style menu.
To add page numbers to the header or footer you use “insert -> field -> page number”. You can include a running head here too, and adjust your tabs (at the top of the window) to make sure that everything is in the right place (e.g. page number on outer edge, running head centred). There are plenty of resources online to help you understand how to do such things, for example this article here.
When you insert a page number field, and type text into your header, it typically replicates that for all pages under that style. For this reason I created multiple identical (but differently named) styles so that I could assign a different one to each chapter and thus have a different running head for each chapter. In order to segregate these style regions I used manual page breaks. I am not 100% certain that this is the BEST way to achieve these effects for running heads but it worked perfectly for me.
Remember that you can control page numbers by specifying what page to start on when you do a manual page break. This is particularly useful if you are not doing everything in one file and need a way to “start” on page 46, for example. This came in handy for the Calderon book partly because the prelims (introduction, contents, etc.) were done in a separate document that was then stitched together with the main text at the PDF stage (more about that in the next entry).
Anyyyyyway…at this point you have the book formatted at least with the right paper size and page numbers so it could technically be exported as a PDF and sent to the printers and printed as is…but don’t do that…do this first:
STEP 2: SET UP PARAGRAPH STYLES AND APPLY TYPEFACES/SIZES
In the original document, Sam1 had specified certain properties of spacing for the standard chapter text, for the quotation text, for titles, and for epigraphs, etc.
As soon as you reformat the pages to be “book” sized a lot of that gets messed up. In particular, Sam1 had been meticulous in using a combination of carriage returns, tabs, and spaces to make his text (especially quotations) look “right” as he wrote it. However, that was under the word-processor’s assumption of an A4 page and now we were dealing in Royal. I swiftly got to work defining styles appropriate to the new page size.

Having made styles for every aspect of the main text, I went through all 500ish pages applying these where relevant. Of course, most of that was a stock “Chapter Paragraph” style for the main text, but there was a lot of adding “Quotation Paragraph” to quotations, and also some titling and epigraph style application.
Remember, at this level it’s not that your styles have to be complicated multi-part profiles, but simply that you’re using them at all to make sure your formatting sticks. In the image above, really the only thing we’re defining is a fixed line spacing (for our typeface and font size that 5.5mm is roughly equivalent to 120% or 1.2). You may also have noticed that I have a range of “Chapter Paragraph” styles with different numbers after them. I’ll explain what that’s all about in the next entry (and it’s actually also why I use fixed line spacing instead of proportional).
In unison with applying paragraph styles I also applied character styles in exactly the same way.

It is highly likely I didn’t strictly need to do separate character styles for these font properties and could have used a part of the menu in my paragraph styles. I realised this somewhat deep into the typesetting process though and decided to stick to this technique as it felt “safe” somehow. I think that what I was concerned about was that somehow I might lose the “inherited” formatting from Sam1’s typescript, such as italicised book titles or underlining. My fears may well have been founded though, as there WAS one place where italics were dropped and I DO think it had something to do with paragraph styles imposing an umbrella character style (this is an error that Sam1 mentioned in his previous entry).
Important to do too in this stage is to adjust tab positions as the defaults will likely still be sticking around from when the document was A4 sized, and that means the tabs (indents) could be far deeper than they should be. You do that by moving the crosshairs at the top of the document in the bar that looks like a ruler, or alternatively directly through your style’s properties menu. But make sure that either way you resave the style afterwards!
By this stage the document should be looking pretty much like a proper book and no longer like A-level coursework. If it all appears correct for printing then you can go to:
STEP 3: EXPORT AS A PDF
This was straightforward in LibreOffice Writer, you just click this:

Which gives you this…

And then you click Export and choose a sensible folder on your computer to put it in.
You get a .pdf file of your book wherever you chose, you can check it over and – assuming all looks good – you’re safe to send it to the printers!
However…as you might have guessed, in the case of the Calderon book there were many, many quirks and complications that vastly overshot the boundaries of this bare-bones typesetting guide.
For now, I hope you have enjoyed seeing a little behind the curtain on how to get a text document into a publisher-ready PDF, but in the next entry I will tackle the really interesting stuff: those challenges unique to typesetting George Calderon: Edwardian Genius, and how we overcame them.


")


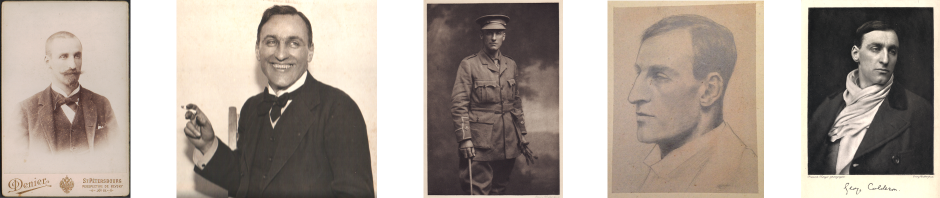
; George Calderon's pencil sketch 'Manu' (right)")


Interesting write-up. How did you decide on OpenOffice?
It wasn’t so much of a decision as just how things worked out! I started experimenting using LibreOffice* because it’s what Sam1 used and…well the more I learned the more I found it could do pretty much what I needed. However, there were refinements I then made using Adobe Acrobat Pro, which I’m going to talk about in part 2! As I do more and more of this I will probably migrate to more powerful software, perhaps something like InDesign that I used to set up my articles on the Warwick Boar.
*In the text I originally wrote ‘OpenOffice’ but I realise now it was actually LibreOffice, which I have now corrected.
TeX is another possibility for (free) typesetting software; it is quite well suited to addressing the sort of detailed typesetting issues that you raise in this post and the following one.
That’s a great call on TeX. I mostly just think of using it when I need to write maths, but yes absolutely it would have done what I needed here too!
What an accessible yet technical piece. It’s so good to see the process set out like an instruction manual combined with a conversation. I now know a bit more about what was going on during those afternoons in front of the computer during January and February.
Lots jumped out at me such as the meticulous use of carriage returns, tabs and spaces in the original word document that had to be converted into styles. I also smiled at the comment about the typeset document no longer looking like A-level coursework.
From what I gathered, solving the quirks and complications filled in the afternoons from March to May, so I’m looking forward to the next instalment.